
Currency


Who among us who love hands-on and crave maximizing space hasn't considered DIY loft beds? Raise the bed high and instantly add a study, leisure corner, or storage paradise below, which is exciting to think about. But DIY loft mattress isn't as easy as nailing some wood forums collectively. Safety, consolation, and durability are all essential. Permit's talk approximately the matters to pay attention to at some stage in the development method.

Chapter 1: Safety First - All parts of The Loft Bed Are Important
The loft bed must first be a safety fortress. Our goal is: even if the most robust bear child in the house is jumping on it, we dare to drink tea below with peace of mind. The core lies in the structural design and connection method.
1.Let wood carry the beam: Understanding the principle of load-bearing
The strength of wood is directional. Imagine a pillar bearing pressure from top to bottom, and our design must prioritize utilizing the inherent advantage of wood.
A well-designed DIY loft bed structure should be able to "passively stand" and withstand some static loads (such as the weight of a mattress and a person) even without a single screw (although this is not possible, just a theoretical explanation), relying solely on wooden stacking. Then, we use fasteners and glue to firmly 'tie' them together, ensuring stability and resistance to lateral forces.
2.The Art of Connection: Choosing the Right 'Joint' and Using the Right 'Ligament'
Joist Hangers are the king! When we need to connect the support beam (the wooden strip that carries the bed board) to the side crossbeam or main beam, never try to save time by directly nailing it in diagonally with nails or screws! This is the most common fatal mistake that beginners make. Be sure to use professional beam hangers. This U-shaped metal component can completely wrap and support the end of the support beam, ensuring that the weight is vertically and effectively transmitted to the crossbeam. Those L-shaped corner braces are not unusable, but if there is space under the support beam to install hangers, then hangers are definitely the preferred and safer and more reliable choice.
3.Fasteners: Small things, big responsibility
Why? Using fasteners that do not meet the requirements, such as cheap or convenient ordinary drywall screws, can have extremely serious consequences! Dry wall screws are brittle and prone to rust, and are highly prone to fracture under sustained loads or vibrations. Imagine that the support beam hanger is still there, but the screws connecting it are broken... This support beam hanger is instantly useless, completely unable to bear weight, and the risk of structural failure is extremely high!
What should I use? It is usually important for these fasteners to have higher strength and corrosion resistance. When purchasing connectors, carefully read the packaging and install them according to the instructions.
Chapter 2: Comfort and Livability - The Art of Living in DTY Loft Bed
Safety is just a passing line, our DIY loft bed still needs to be comfortable to live in, otherwise it will become a 'chicken rib'. The loft space is unique, and comfort requires more careful planning.
1.Floor height and spatial sense: Refusing the experience of "cage homes"
The height of the floor is the key! This directly determines whether our feeling on it is a "comfortable nest" or a "oppressive cage".
Entrance height: The height of the entrance to the DIY loft bed (the "hole" we climb up and enter) is strongly recommended to be no less than 1.2 meters (about 4 feet). This height allows we to bend in and out relatively naturally, rather than crawling awkwardly.
Internal clear height: This is the distance from the top of our head to the ceiling when we sit on the bed. Goal: Sit up straight without touching each other, and lie down without feeling pressured. What specific height is suitable? This needs to be combined with our height and spatial perception. A practical method is to place the mattress on the bed, then sit up and measure the distance from our head to the ceiling to reserve space. At least leave enough space for us to sit comfortably straight (usually 45-60cm or more). When lying down, the sense of open space above can greatly alleviate feelings of oppression.
Size ratio: Accurately measure the furniture we plan to place (if needed), such as small side tables and storage cabinets. Proportional coordination is the foundation of comfort.
Ventilation and mold prevention: the lifeline of diy loft bedrooms! (Lessons from Blood and Tears)
The experience we have gained through painful experiences must be capitalized and bolded! The loft space is relatively enclosed, with poor air circulation, and dampness and mold are the top enemies! Neglecting ventilation can quickly damage our beloved bedding and expensive mattress.
2.Convenient Facilities: Small Details, Great Happiness
Electricity supply: Go to sleep, do we need to charge our phone? May I need a small desk lamp, alarm clock, or humidifier? Plan the circuit in advance and install a USB socket panel next to the bed, or at least connect a secure and safe extension cable from below (the cable should be fixed to avoid tripping risks). Don't underestimate this, getting out of bed to charge is really annoying.
3.Intelligent storage: squeeze out every inch of space
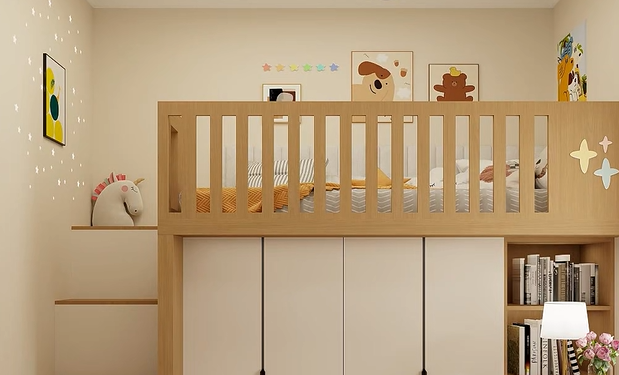
The treasure area under the ladder: The space below the ladder is like a DIY loft bed's golden storage area! Creating an embedded wardrobe or storage cabinet here is an excellent choice. Embed the cabinet into the wall (if it is a load-bearing non shear wall, it needs to be professionally evaluated and reinforced), or build it tightly against the wall. The cabinet door adopts sliding door or flip up door to ensure that the cabinet door is flush or nearly flush with the wall. From the outside, it appears harmonious and unified as a whole, without appearing abrupt, and maximizes the saving of valuable activity space below.
Customized furniture is king: Loft spaces are usually irregular. The best way is to customize furniture based on accurately measured spatial dimensions. Whether it's a bedside table, bookshelf, or storage box, customized not only looks beautiful but also coordinated.

Chapter 3: Planning and Implementation - Blueprint for Realizing Dreams
1.Space surveying: Take out a tape measure, pen and paper (or drawing software), and accurately measure the length, width, and height of the room (especially paying attention to whether there are obstacles such as beams and sloping ceilings on the ceiling).
2.Determine the key height: Based on the height and usage habits of the occupants (the purpose of the space below), repeatedly consider and confirm the installation height of the diy loft bed (the distance from the bottom edge of the bed board to the ground). This determines the availability of the space below and the sense of height on the upper level. Mark the key position lines on the wall with chalk or tape, and feel them intuitively.
3.Posts: Carrying the core weight, they must be sturdy! Commonly used are 4x4 (actual size approximately 3.5 "x 3.5") or thicker woods. Choose structural grade wood such as SPF (spruce pine fir) grade 2 or above, with higher strength. Avoid using materials with severe knots, cracks, or distortions.
4.Beams/Ledger Boards&Joists: Select dimensions based on span. Commonly used are 2x6 and 2x8 (with an actual thickness of about 1.5 inches). Structural grade wood is also selected.
5.Bed board/side board/decorative board: Environmental protection without pollution is the top priority! The harmful substances such as formaldehyde released by inferior boards are more harmful in relatively enclosed loft spaces.
6.Color and texture: Warm tones are usually easier to create a warm and comfortable DIY loft bedroom. Solid color or wood grain clear and natural finishes can bring more harmony and reduce visual clutter in small spaces than overly fancy patterns. Coating with clear varnish or wood wax oil can preserve the natural texture of wood and is also more environmentally friendly.
7.Breathability: In addition to the ventilation measures emphasized earlier, in the design of DIY loft beds, it is also advisable to avoid completely sealed boxes around the bed (unless it is a specially designed storage box, but ventilation holes should also be considered), allowing air to flow naturally inside and outside the structure.
Conclusion: Let's build our own aerial castle
A loft bed is not just a wooden construction project, but also requires a combination of structural and spatial engineering.
The process may be challenging, requiring patience and meticulousness, but when we wake up in the safe and comfortable sky bedroom we have built ourself, and look at the precious space below that suddenly opens up, the sense of achievement and joy of doubling the space is definitely incomparable to buying finished furniture. Remember, DIY loft bed is not the end point, but the starting point that opens up infinite possibilities in our small space.
E-Mail-Formatfehler
emailCannotEmpty
emailDoesExist
pwdLetterLimtTip
inconsistentPwd
pwdLetterLimtTip
inconsistentPwd
